MIDI Samples are built for those of us looking to imbue our in-the-box productions with an extra human element.
With all the tools available to music makers at this point, it’s fairly easy to sit down and make a whole song without ever pressing a key on a keyboard or playing a note on a guitar. This array of tools is an enormous asset to the modern producer, allowing for greater speed and versatility of sound. But what sometimes get lost in this process are the subtle imperfections that give an otherwise rigid instrument the feel and vibe of a live performance. This is not the case with MIDI Samples, which come with plenty of groove to go around.
Ableton users might know of a useful section of their DAW known as the Groove Pool. For those who aren’t familiar, the Groove Pool allows you to store rhythmic information independently from any assigned pitches or sounds and then apply that rhythmic information to any MIDI or audio clip in a project. So what does this mean? It means that you can take the swing of a drum pattern, the pocket of a bassline, or the saunter of a soulful key part and, with just a few button presses, lock in the rest an arrangement to the chosen part.
We’ve gotten some pretty jaw dropping results doing just while using MIDI Samples as the source of the Groove. Here’s how you can try this too:
Diving into the Groove Pool
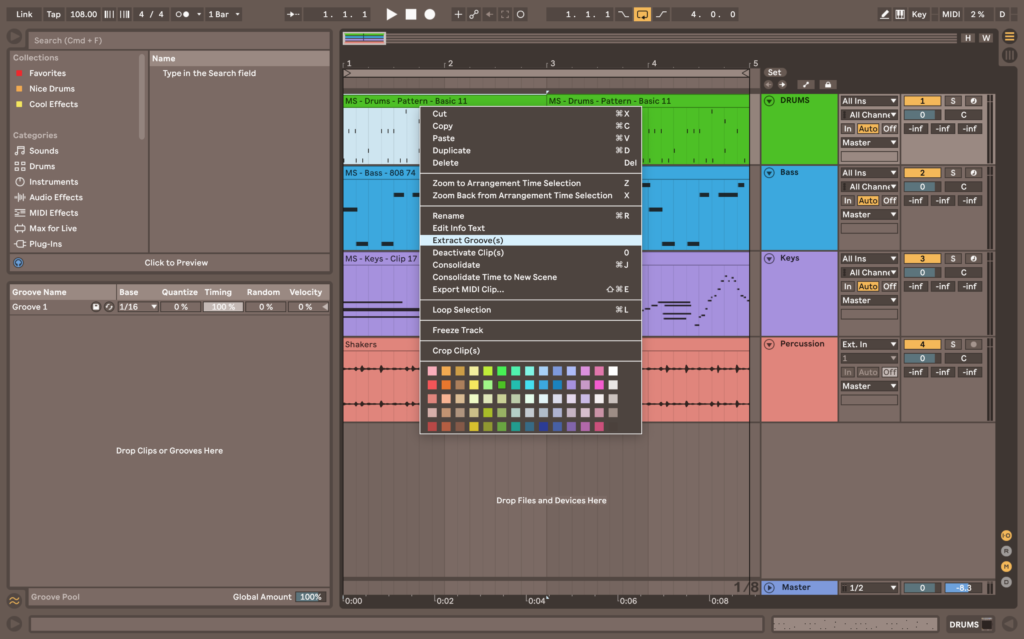
Open an Ableton session with at least a couple tracks. For our example we have Bass, Keys, and Percussion, and we’re looking to add a Drum part.

Find a suitable MIDI Sample for the drum pattern. We’re auditioning a few using the Native Instruments Vintage Drummer instrument.
Once you’ve found a suitable pattern, it’s time to Extract Groove. It sounds like a rather surgical procedure, but is actually very easy. Simply right click on the MIDI file on your timeline and select “Extract Groove”. Now the rhythmic information of your drum pattern will appear as “Groove 1” in the Groove Pool. (It might also be named based on the clip you extracted it from).
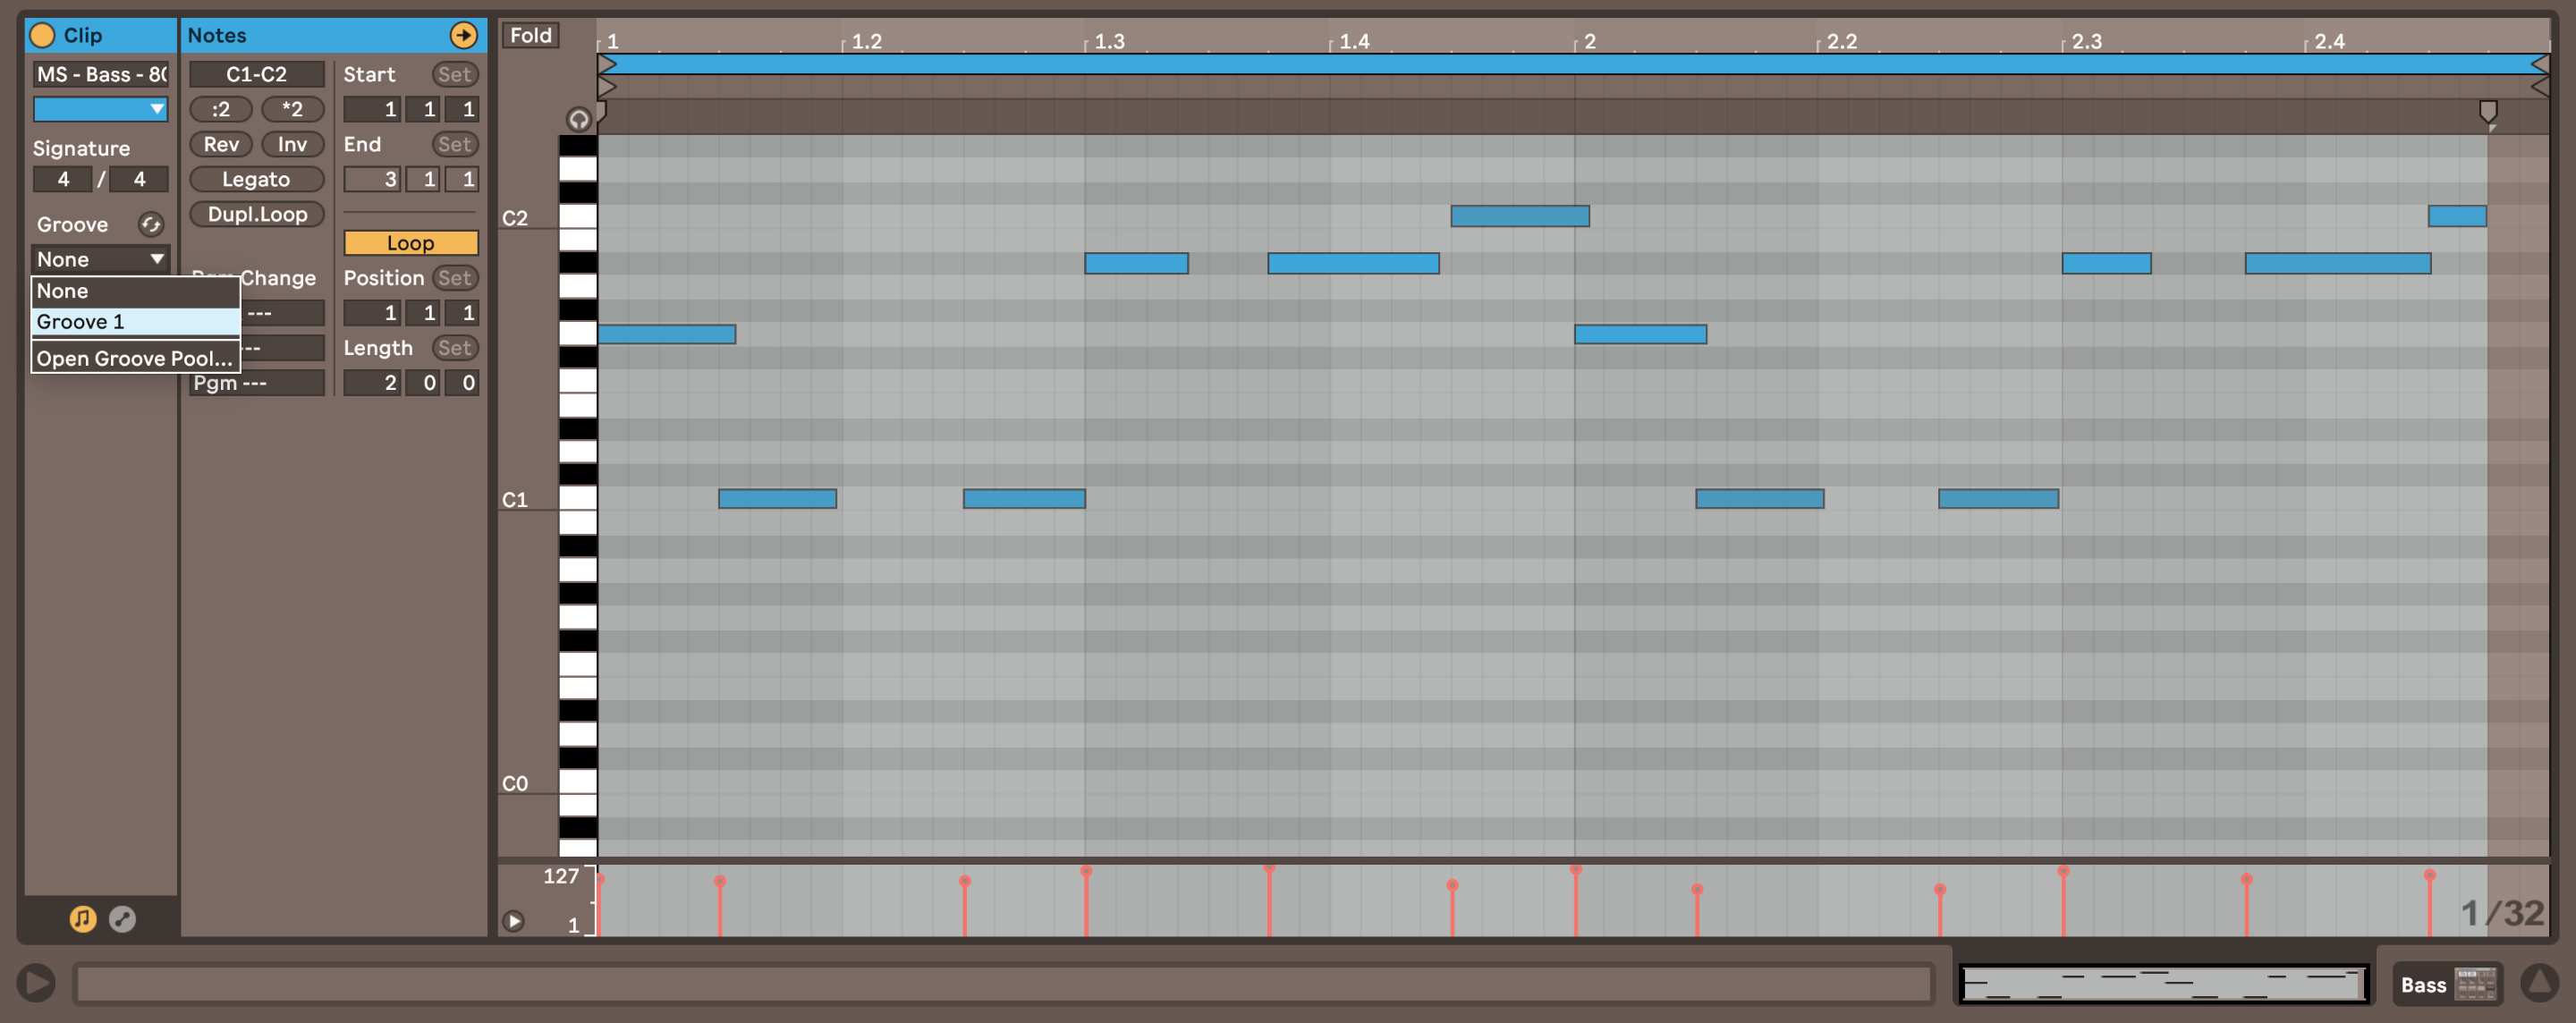
Next, select another clip on the timeline (we’re choosing Bass to start) and locate the Clip View section for the chosen clip.

Here you’ll see the word Groove and a dropdown menu underneath that defaults to “None”. Select “Groove 1” from the dropdown menu, press “Commit”, and voila! You’ll see the MIDI notes (if done on a MIDI clip) or the transients (if done on audio) shift off the grid and lock in to the timing of the MIDI Samples drum loop you chose.
We hope you found this helpful in providing yet another workflow option when working with the MIDI Samples MIDI loop libraries! There are countless ways to accomplish each aspect music making nowadays, but we find it’s techniques like these that really make the difference between amateur and professional productions. The best tools for music producers are often hiding right in plain sight.